Use Levels to Solve Image Exposure Problem
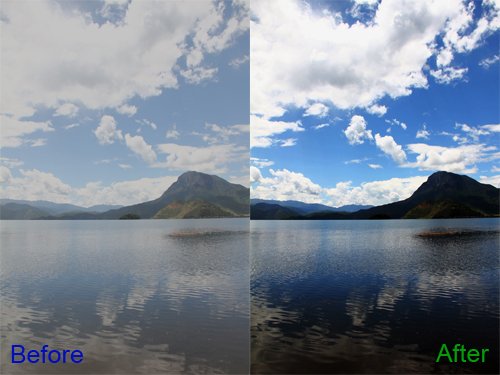
In PT Photo Editor, Levels is a useful tool for correcting image exposure problem. It has the power to adjust brightness, contrast, and tonal range by moving and stretching the brightness levels of an image histogram. Since every photo's histogram is unique, there is no single way to adjust the levels for all your photos. A proper understanding of how to adjust the levels of an image histogram will help you better represent tones in the final image.
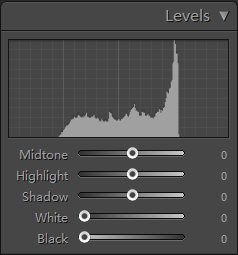
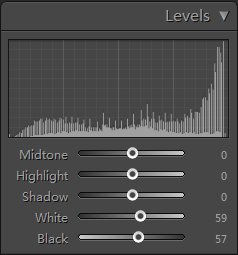
In Levels panel, the histogram represents the range of dark and light pixels in your image, with black at the left and white at the right. Below the histogram are five sliders for setting the light values in your photo.
 |
 |
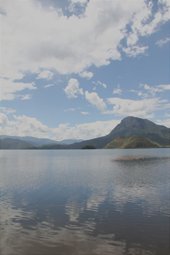
This histogram is typical of a washed out, low-contrast photo. You can see that the "black" or left edge of the histogram curve does not reach the left edge of the box, and the "white" or right edge of the histogram does not reach the right edge of the box.
In an ideally exposed photo, we usually want to take full advantage of the entire light/dark range available to our cameras and our eyes. In other words, we want the brightest pixels in our image to be pure white, and the darkest pixels in our image to be pure black. In a photo like this one, they instead range in tone from dark gray to light gray, making it a low-contrast image.
To quickly correct the tonal range of the image and expand it to take advantage of the full light/dark spectrum, simply drag the "White" slider or rightmost part of the histogram to the right until the right edge of the histogram reaches the right edge of the box. Then drag the "Black" slider to the right or drag the leftmost part of the histogram to the left until the left edge of the histogram reaches the left edge of the box. So that the darkest pixels become black and the lightest pixels become white, and the rest are spread appropriately in between.
 |
 |
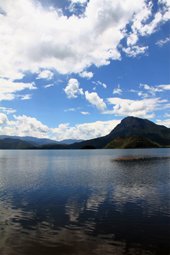
It’s the most common starting point for tonal adjustment. We may call this "basic adjustment" to Levels. Of course, your eye must always tell you whether it’s right for any given image or not.
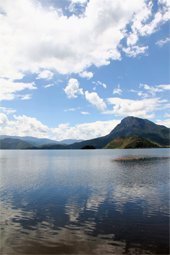
In the photo here, while this basic adjustment is a big improvement, I would like to go further to bring the clouds out of the sky. To darken the midtones of the image, I move the "Midtone" slider to the left. After this adjustment, we can find the clouds become clear, and the sky and water turn into a more beautiful blue.
 |
 |
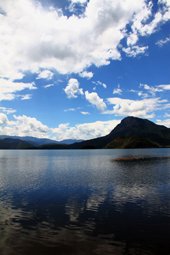
Now, I can add a little contrast to the image by moving "Shadow" slider to the left. This will make the shadow parts of the image to be darker without losing blacks detail.
 |
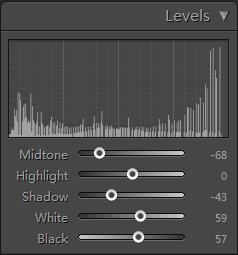 |
In this case, I have dragged the "White" and "Black" sliders" to correct the tonal range, "Midtone" slider to adjust the brightness and bring out the sky, "Shadow" sliders to increase the overall contrast. All of this took just a few seconds in PT Photo Editor.
While it is a little more complex than the "Exposure" and "Contrast" sliders, the Levels tool provides more precise tonal correction, and it gives you separate control over the shadows, highlights, and midtones in your photo. You may find it is an easy and powerful way to solve image exposure problem.
Photoshop&Lightroom are trademarks of Adobe Systems Inc.