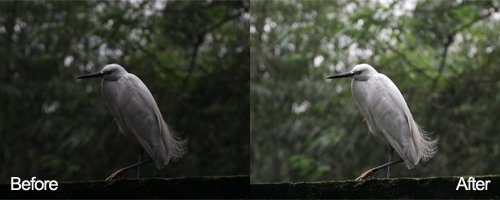
Rescue Poorly Exposed Photos 1 – Fix Underexposed Photos
Exposure may be the most common problem in photography. Whether your image is underexposed (too dark), overexposed (too bright), or just washed out in a hazy low-contrast fog, improper exposure can ruin an otherwise good shot.
Luckily, not all poorly exposed photos means a complete failure. Before you give up hope there are a few things you can do to try and salvage them, especially when the photo you really like is impossible to be retaken.
Today I’ll show you how to quickly brighten underexposed photos in PT Photo Editor. Then in the next tutorial, I’ll use similar ways to darken overexposed photos.
Fix an underexposed photo
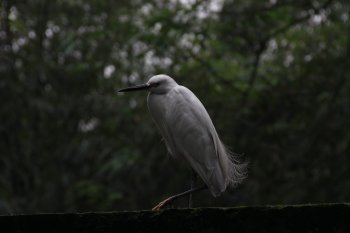
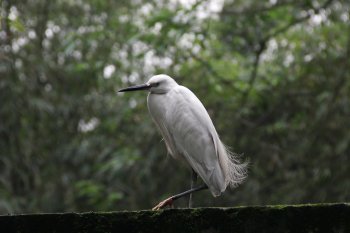
Here is a photo I shot in the woods. It was a cloudy day, but the underexposed problem makes it look even darker than it actually was. I like the lovely white bird, so let’s try three different ways to fix it.
1. Use "Exposure" and "Contrast" to make a quick adjustment
Tweaking "Exposure" in Basic panel is the simplest way to brighten the image. But be careful, too much will increase the white pixels, ruining the highlight details of the original image. For this photo, I should avoid losing the details of the bird’s feather while adding exposure. Then, I add some contrast to it.
 |
 |
2. Make a precise tonal fixing with Levels
Though "Exposure" can give you a quick adjustment, I prefer to use Levels tool, because it provides more precise tonal correction, and it gives you separate control over the shadows, highlights, and midtones in your photo.
This photo’s histogram is typical of an underexposed photo. We can see that the right edge (white part) of the histogram does not reach the right edge of the box. In an ideally exposed photo, we usually want to take full advantage of the entire tonal range.
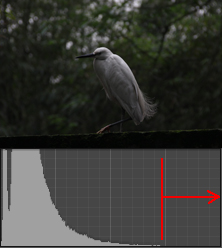
First I pull the histogram to the right edge until the brightest pixels in the image become pure white by tweaking the "White" slider. But I find the image still look dark, because there are too much pixels concentrated in the left edge (dark part) of the histogram. So I move the "Midtone" slider to the right to brighten it, and this won’t increase any white pixels in the image. After that, if you want to make the background darker, you may reduce a little value of "Shadow".
 |
 |
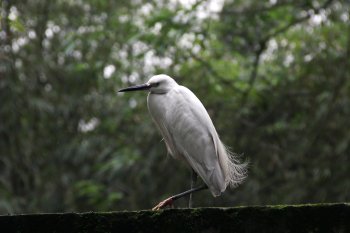
3. The most flexible tool in tonal adjustment - Curves
Curves is another quite convenient and flexible tool for tonal adjustment. In this photo, to adjust exposure, as the image shows, choose the RGB channel, add and drag up the points in the curve to brighten the photo. The lower point brightens the shadow part of the photo, the middle point keeps midtones not being overexposed, while the upper point makes the brightest pixels become pure white.
 |
 |
Photoshop&Lightroom are trademarks of Adobe Systems Inc.