How to Reduce and Remove Wrinkles Easily
Although wrinkles can be signs of experience and wisdom, most people would rather not have them. This tutorial shows you a simple way to remove wrinkles in PT Photo Editor which can be a great way to enhance a portrait photograph.
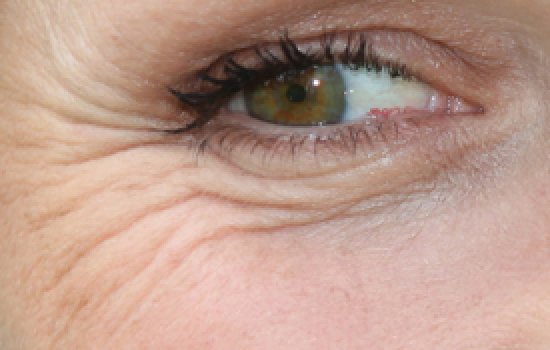
Step1: Open an image and zoom in
Open an image in PT Photo Editor. To zoom in on the wrinkles area quickly, move the mouse pointer to the wrinkles, hold [ctrl] and scroll up the wheel. You can also do it by using the Navigator tool.
Step2: Choose and customize the Clone tool
In Global Edit module, press [O] or click  in the tool stripe to select the Clone Tool.
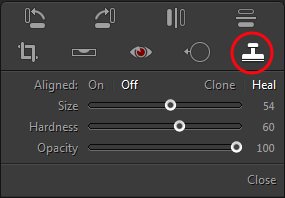
In clone tool, there are two clone modes:
Clone: Duplicate the sampled area of the image to the selected area.
Heal: Match the texture, lighting, and shading of the sampled area to the selected area.
Choose the Heal mode here.
Adjust the clone brush to a proper size. The brush should be large enough to fit over the wrinkle with a bit of space each side.
Dropping the Hardness of the brush will give you a soft edged brush so that the transition to the surrounding area is gradual.
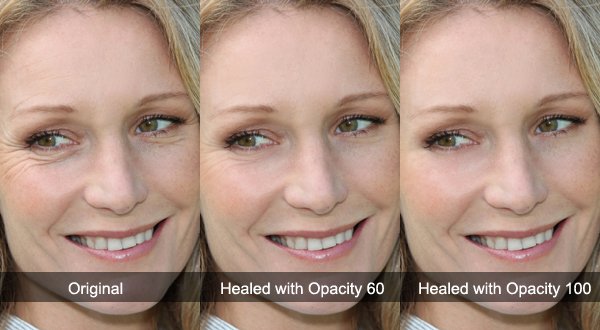
The Opacity controls how strong the fix is. So if you just want to reduce the wrinkles, not completely remove them, decrease the opacity.
With the Aligned option turned off, you’ll continue to sample good texture from the same area you clicked on until you click on a different area. This is usually the behavior you want with the healing brush. Generally speaking, if you’re using the Clone mode, you’ll want Aligned selected, and with the Heal mode, you’ll want it deselected.
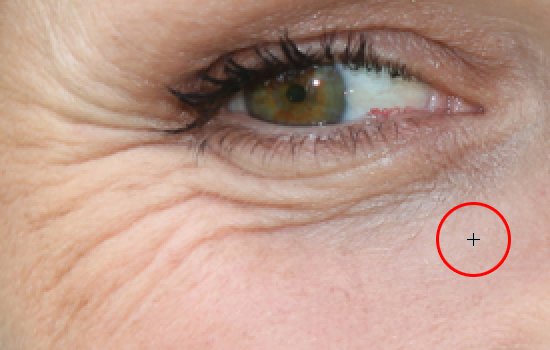
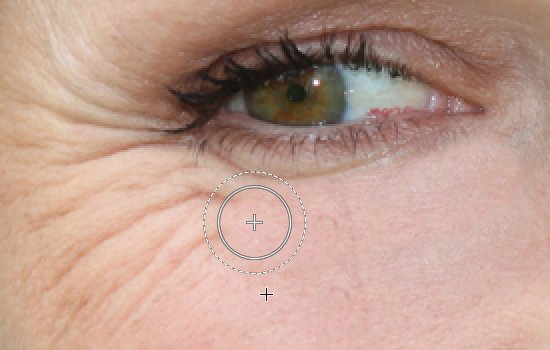
Step 3: [Ctrl] + Click on an area of good texture to sample it
Using the Cloning/healing brush is a two-step process. First, click on an area in the image that contains good texture to sample it, then paint over the problem area to replace the unwanted texture with the good texture. As skin texture appears different in different areas of a person’s face, so if you want your retouching work to look as realistic as possible, try to sample good texture from an area close to the wrinkle to keep the skin texture consistent.
To sample an area of good texture, hold down [Ctrl] key, which will temporarily turn the brush cursor into a small plus sign (+), and click on the area.
Step4: Paint over the wrinkle to heal it
Once you've sampled your good texture, release [ctrl] key, move the brush over the wrinkle you want to remove with your mouse button held down as you paint over it.
When you paint along the wrinkle, the small plus sign moves along with you as you paint. The area directly under the plus sign is the good texture that’s being sampled, making it easy to see exactly where the texture is coming from.
After you release the mouse button, PT Photo Editor blends the new texture in with the original color and brightness of the problem area, and the wrinkle disappears.
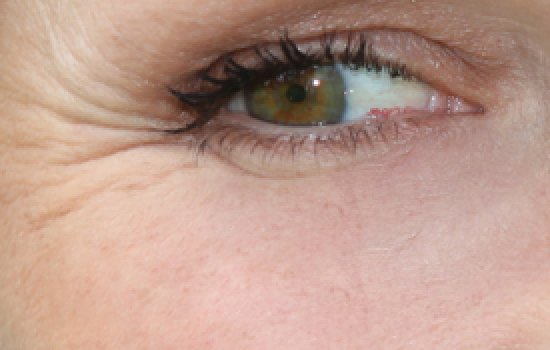
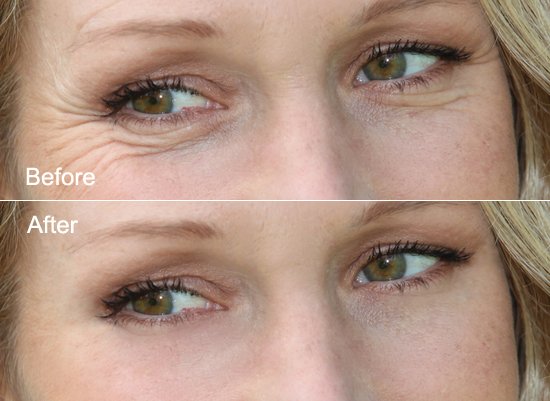
Here are the final results after retouching:
Photoshop&Lightroom are trademarks of Adobe Systems Inc.