Create a Beautiful Sunset Effect for Your Cold Daylight Photos
A warm, colorful sunset/sunrise mood image is something most of us like. In PT Photo Editor, with some simple tricks, you can give a breathtaking sunset effect to many of your cold daylight landscape photos. This tutorial will show you how to do it.
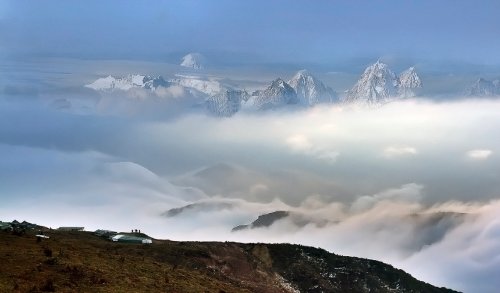
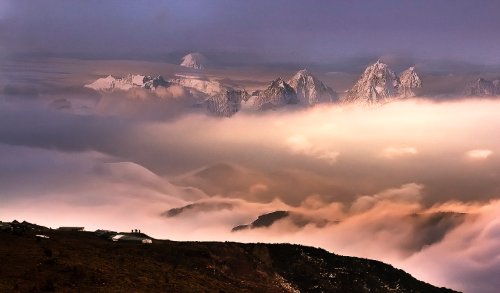
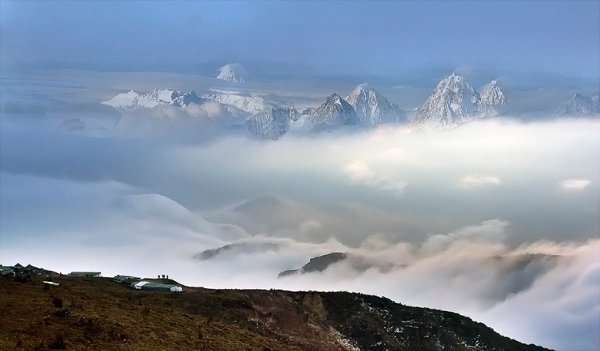
Here is the example image. Although it was shot in the afternoon, there were not a lot warm tones in the atmosphere and the photo lacked some vibrance.
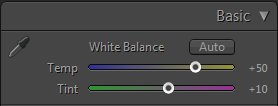
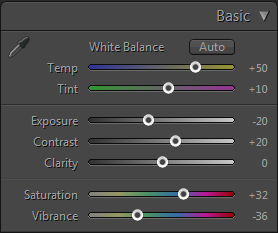
Step 1 – Increase temperature and tint of white balance
First warm up the image by raising the Temperature. Additionally, we want to add some Magenta Tint in order to keep the image from looking too green.
Step 2 – Adjust image brightness and contrast
Usually, we can correct the image tone with auto-levels in Levels panel instantly.
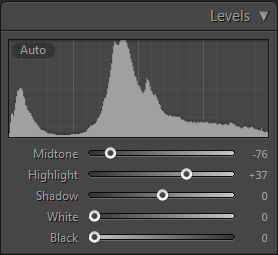
But here since we want a moodier shot, after the auto-levels adjustment, the background environment looks still a little too bright and flat, so let’s lower the exposure and increase a little contrast in Basic panel.

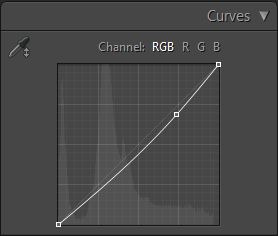
You can also use curves to do some finer adjustments.

Step 3 – Use vibrance/saturation trick to improve the color
Next, we’re going to improve the colors to make the "sunset" more vibrant. Here we use a vibrance/saturation trick - reducing the vibrance setting, then increasing the saturation. After that, you can see the image looks like with the red sunset glow pumped up.

If you like the image the way it is now, you’re done!
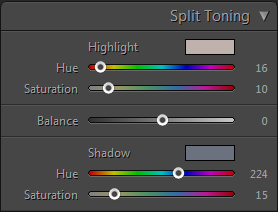
Step 4 (optional) - Add artistic colors using split toning
Sometimes you can use split toning settings to give the image a more special feeling. For example, we want to make the shadows more blue and the orange glow look warmer. So in the Split Toning panel, set the hue of the highlights to 16 and shadows to 224, then adjust the saturation of each to your likes.

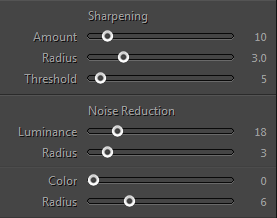
Step 5 (optional) - Sharpening and Noise Reduction
Sometimes we do need to apply some Noise Reduction and Sharpening in Details panel to improve the image details.
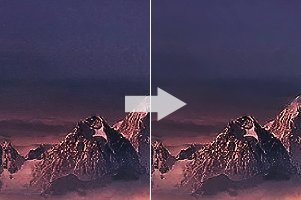
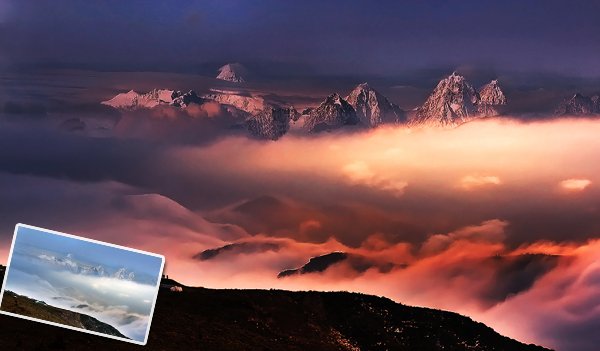
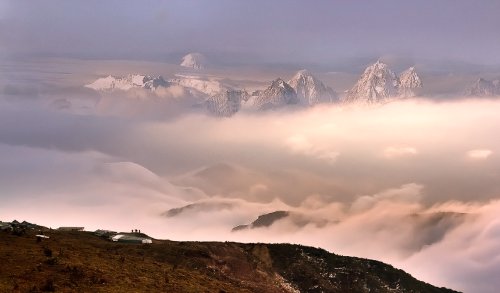
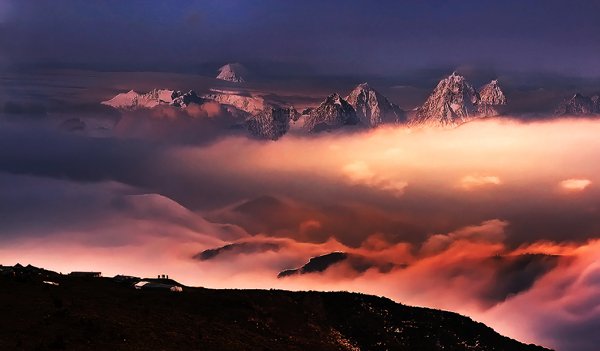
Final Before and After Images
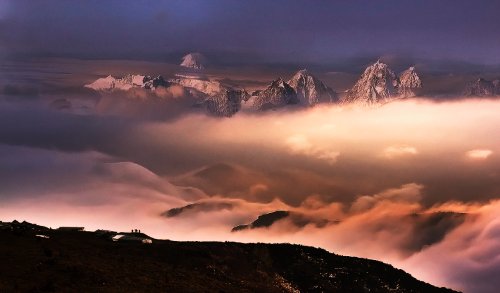
Finally, here are the before and after images comparing the original image to the new image with the warm, sunset mood look.
Original
Final Result
Photoshop&Lightroom are trademarks of Adobe Systems Inc.