How to Remove Unwanted Objects with Clone Tool

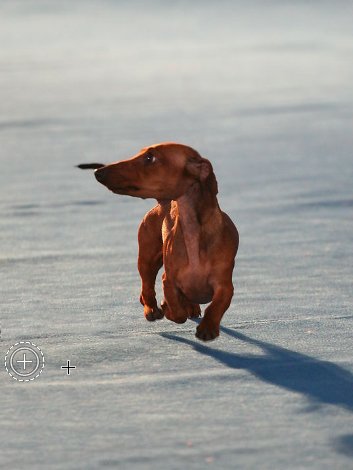
One of the most useful tools in photo fixing is the Clone Tool. This tutorial is to help you learn how to remove unwanted objects from a photo using the Clone Tool. For this photo (in order to draw more attention to the dog) I removed the dog leash and the man shadow. Once you have your photo open in PT Photo Editor:
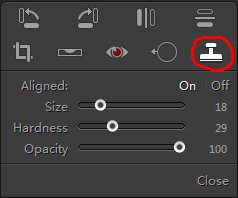
1. Select the Clone Tool from the tool panel or press [O], set the brush for appropriate size, hardness and opacity.
Note: Mousewheel => Size; [Shift] + Mousewheel => Hardness.
2. Hold Ctrl and click somewhere to take a good sample. (Wherever you take a sample, that’s what you going to be drawing in place of the removed object).
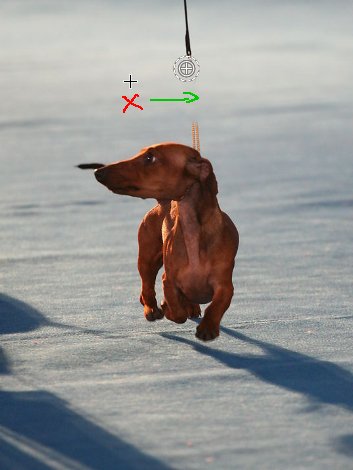
3. Release Ctrl and carefully click and drag the mouse over the item you wish to remove. (You will notice that the spot where you took the sample will follow your movements).
Note: If you want to use the sampled pixels from the initial sampling point each time you stop and resume painting, choose "Aligned Off" in Clone Tool panel.
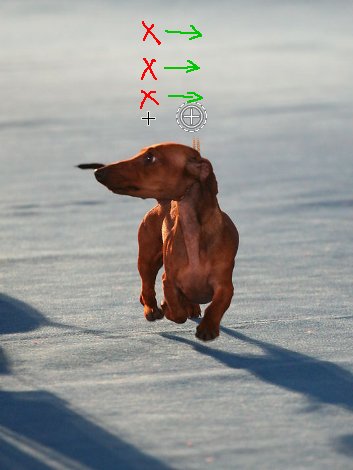
4. Continue to repeat steps 2 and 3 until the unwanted object is completely gone. You might need to change techniques a little based on available places to take a good sample. With practice this tool is very valuable.
Photoshop&Lightroom are trademarks of Adobe Systems Inc.