Photo Toolbox
Retouch & Fix
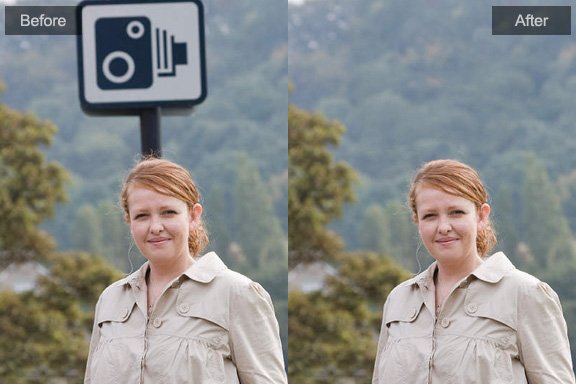
 Clone-Stamp
See how to use Clone Stamp tool.
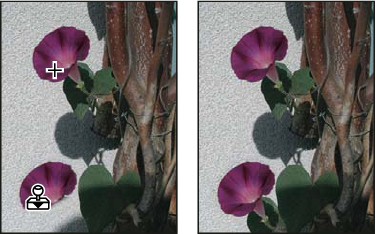
The Clone Stamp tool is the most useful in image fixing. It paints one part of an image over another part of the same image. It is useful for duplicating objects or removing a defect in an image.
To use the Clone Stamp tool, you set a sampling point on the area you want to copy (clone) the pixels from and paint over another area. Then drag over the area of the image you want to copy the sampled pixels to. To paint with the most current sampling point whenever you stop and resume painting, select the Aligned option. Deselect the Aligned option to paint starting from the initial sampling point no matter how many times you stop and resume painting.
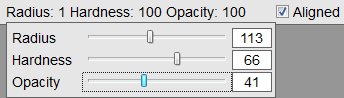
You can use pen options(radius, hardness and opacity), which gives you precise control over the size of the clone area and how paint will be applied to the cloned area.
Operation:
1. Select the Clone Stamp tool.
2. Set pen options for the radius, hardness and opacity in the options bar.
3. To specify how you want to align the sampled pixels, set the following in the options bar:
Select Aligned: Samples pixels continuously, without losing the current sampling point, even if you release the mouse button.
Deselect Aligned: Continue to use the sampled pixels from the initial sampling point each time you stop and resume painting.
4. Set the sampling point by positioning the pointer in any open image and Alt-clicking
5. Drag over the area of the image you want to correct.
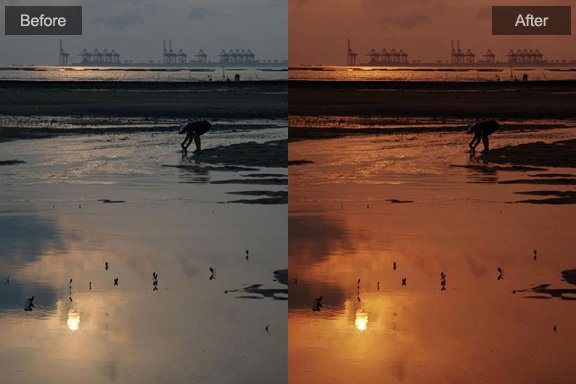
 Dodge/Burn
It is a pair of image fix tool used to lighten or darken areas of the image, the Dodge tool and the Burn tool are based on a traditional photographer’s technique for regulating exposure on specific areas of a print. Photographers hold back light to lighten an area on the print (dodging) or increase the exposure to darken areas on a print (burning). The more you paint over an area with the Dodge or Burn tool, the lighter or darker it becomes.

Operation:
1. Select the Dodge/Burn tool, and choose a mode on options bar.
2. Set pen options for the radius, hardness and opacity in the options bar.
3. Drag over the part of the image you want to lighten or darken.
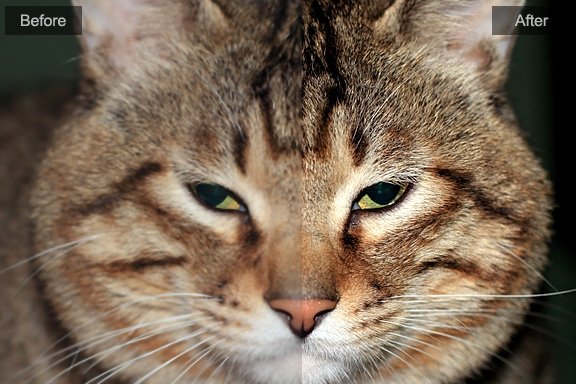
 Blemish Remover
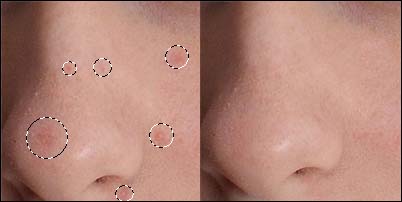
The Blemish Remover tool quickly removes blemishes and other imperfections in your photos. The Blemish Remover works similarly to the Clone Stamp: it paints with sampled pixels from an image or pattern and matches the texture, lighting, and shading of the sampled pixels to the pixels being healed. Unlike the Clone Stamp, the Blemish Remover doesn’t require you to specify a sample area. The Blemish Remover automatically samples from around the retouched area.
Tip: If you need to retouch a large area or need more control over the source sampling, you can use the Clone Stamp instead of the Blemish Remover.
Using the Blemish Remover to remove a blemish:
1. Select the Blemish Remover tool from the side-bar.
2. Choose a blemish size in the options panel. A size that is slightly larger than the area you want to fix works best so that you can cover the entire area with one click.

3. Click the area you want to fix.
 Red-eye Reduction
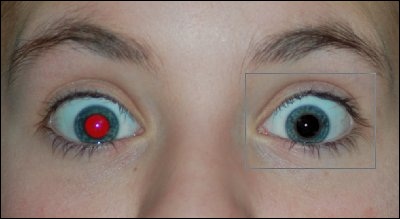
You can remove red eye from an image using the Red-eye Reduction tool which is on the side-bar of the main window. The red eye reduction tool changes the saturation and brightness of the area you selected without removing detail from the image.
To remove red eye using the red eye reduction tool:
1. Select the Red-eye Reduction tool from the side-bar.
2. Use the zoom tool to enlarge the red-eye area of the image you want to retouch.
3. Press the left-mouse-button and drag the mouse(creating a selecting box) to select one red-eye.
4. After releasing the mouse button, the selected red-eye will be fixed automatically.
5. If the fixed eye is not dark enough, increase the 'Darken Amount' setting in the options bar, and try again.

Photoshop&Lightroom are trademarks of Adobe Systems Inc.