Photo Toolbox
How to editing photo with Clone Stamp tool ?
One of the most useful tool in photo fixing is the Clone Stamp. In photo fixing software programs, the Clone Stamp tool replaces a specific chosen area with another. You can choose the size, hardness and opacity of the stamp depending on the need - larger for larger areas to very small for fine detail editing.
Tip: Zoom in and out as needed. For larger areas, start out zoomed out and then zoom in for finer detail along edges and reduce the size of the stamp.
Tip: Know where the Undo button is. The program doesn't support unlimited numbers of history records. So check your work each time.
The stamp is a circle shape, and you can choose the radius, hardness and opacity of the circle-pen. Put the mouse cursor on a spot that you want to clone or transfer/repeat. You have to press 'Alt' key while you left click on the mouse. If you use the wrong button or key, the program will display a message reminding you what to do. Then put the cursor over the area you want changed and regular left click on it. You can also hold the mouse button down and drag the cursor over a larger area.
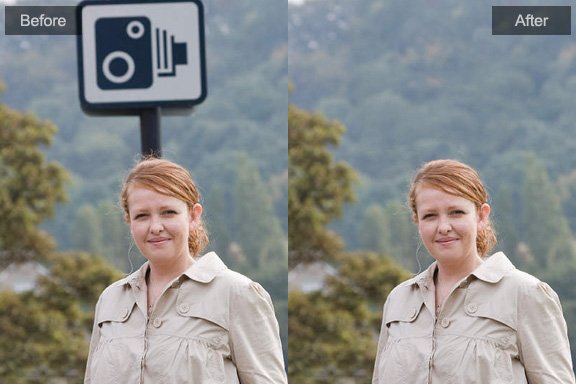
The main use for the Clone Stamp is to remove unwanted distractions. These can be people or other objects in the background or foreground not caught during composition of the photo.
This was a fairly nice photo of a beautiful bird, but the branches around it were distracting:

The small twigs in the upper right were removed, then the object in the lower left was removed:


The twigs around the bird’s head and feet were removed:


The remaining branch was still distracting so it was also removed:

The above result was appealing but could still be improved for the final product:

The clone stamp is also useful for removing dust, stains, cracks and scratches on scanned photos, especially in restoring old photographs:
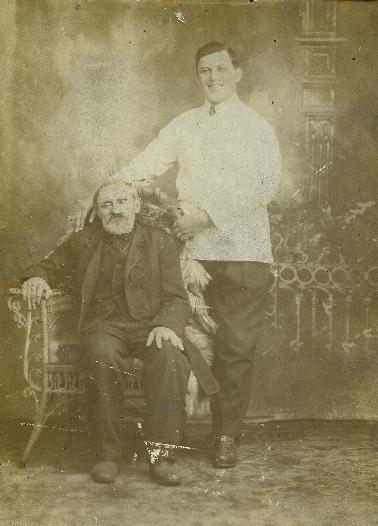
This photo had many defects from damage over many years, which were removed using the clone stamp tool. The scratches were removed from various areas:

The resolution was adjusted and the yellowing was removed:

Photoshop&Lightroom are trademarks of Adobe Systems Inc.