Edit Copyright Watermarks
In the Watermark panel of PT Watermark:
- Add a Text, Image or Graphic watermark on the picture.
- Adjust the watermark Size and Position.
- (Optional) Specify Watermark Effects.
Add a Text Watermark

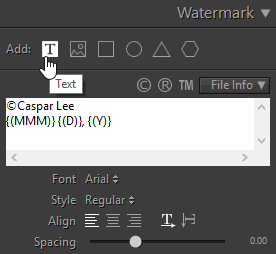
To add a text watermark, click "Add Text" button or right-click on the photo and choose "Add Text", enter the text in the text box and specify Text Options: font, style, alignment, line spacing, fill color and outline.
To enter the text, do either of the following:
- Type the text in the text box. Click
 /
/ /
/ button to enter copyright and trademark symbols quickly.
 - Click the "File Info" button and choose the file information you want to add.
Add a Image Watermark


To add an image watermark, click "Add Image" button or right-click on the photo and choose "Add Image", then navigate to and choose the PNG, JPEG or BMP that you want to use. To change the image, click the "Change image…" button.
Add a Graphic Watermark

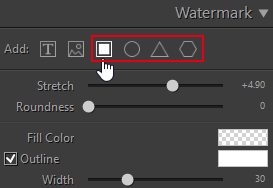
To add a simple shape to the photo, click the shape button or right-click on the photo and choose "Add Graphics". Moving the "Stretch" slider to right will make the shape wider, while moving it to left will make the shape taller.
Adjust Watermark Size and Position

When a watermark is selected, you can directly position, scale and rotate the watermark by clicking and dragging it on the picture, and you can also fine-tune its location and size by pressing [↑][↓][←][→] and [+][-] keys.
 You will also notice that selecting a watermark displays a bounding box anchored to points on the photo/frame’s border/center, which shows where to place the watermark in relation to the photo/frame’s border/center. To set the anchor point to a fixed location, click or drag it. The anchor point becomes orange when fixed.
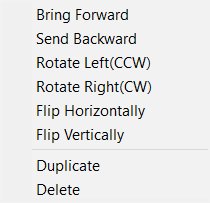
To delete a watermark, press [Delete] key when it is selected or right-click it and choose "Delete".
To change a watermark layer order, right-click it and choose "Bring Forward/Send Backward".
To duplicate a watermark, right-click it and choose "Duplicate".
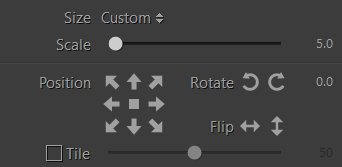
- Size - Proportional scales the watermark larger or smaller. Fit sizes the watermark across the width of the photo. Fill sizes the watermark to fill the height and width of the photo.
- Position - Repositions the watermark to one of the nine anchor points in the photo/frame.
- Rotate - Rotate the watermark left/ right or by custom degrees.
- Flip - Flip the watermark horizontally or vertically.
- Tile - To fill photo with your watermark, enable the "Tile" option. Use the slider to control the spacing between watermarks.

Watermark Effects

Opacity - Adjust the level of transparency of the watermark.
Blend Mode - The blend mode controls how to blend the watermark color with the background color.
Shadow - To add a shadow, select "Shadow" and use the controls to adjust it:
- Click the color box to specify a shadow color.
- Opacity - Sets the shadow's lightness or darkness.
- Offset - Sets the shadow's distance from the image.
- Radius - Sets the hardness or softness of the shadow's edge.
- Angle - Sets the direction of the drop shadow.
Photoshop&Lightroom are trademarks of Adobe Systems Inc.